8 Steps for Treating Cat Ear Infections


Your cat has just been diagnosed with an ear infection.
You’ve probably been sent home with medications to treat cat ear infections, including some sort of ear ointment, an ear cleaner, and instructions on how to clean and medicate your cat’s ears.
But then you find out that your sweet kitty will do anything to keep you from administering treatment.
Don’t give up. Follow these steps to make treating your cat’s ear infection a more pleasant experience for you and your cat.
1. Get Your Cat Used to the Idea of Having Their Ears Treated
Cat ear infections can be quite painful, almost like living with a constant migraine, and even the sweetest and most gentle of cats can react by scratching, biting, or trying to run away.
You need to use positive reinforcement (reward your cat) to get your cat used to having their ears cleaned and medicated. Punishments such as shouting, hitting, or rough handling will only exacerbate the problem and instill fear in your cat.
First, establish a comfortable and quiet area where you will treat your cat. Take them to this area routinely and give them a special treat. For more severe or painful conditions, you can get your cat accustomed to being held in your lap by wrapping them in a towel, blanket, or pillowcase.
Touch your cat’s face and ears gently as you give them their special treat. Continue this exercise multiple times and then place several drops of the medication into their ears. You will not be administering the treatment yet; these drops are just to get them used to the idea before you start.
Once you have done this a few times, you can go to the next step of cleaning their ears.
2. Prepare Your Supplies
Administering cat ear infection treatment can be difficult, so you should have the proper supplies ready in the treatment area that your cat is now used to. Read the directions for the medication(s), then gather your supplies:
-
Ear cleaner and medication (if the medication requires refrigeration, be sure to allow it to come to room temperature prior to use)
-
Cotton balls
-
Food/treats
-
Pillowcase, blanket, or towel
-
Disposable gloves (for changing in between cleaning ears)
3. Make Sure You Know Which Ear You’re Treating
Take your cat to the treatment area.
If you’ve forgotten which ear (or ears) requires treatment, refer to the directions or call your vet. Often, pet parents describe their pet’s problem area from their perspective (e.g., head-on) instead of from their pet’s perspective.
So when the vet or the staff say “right” or “left” ear, remember that they are talking about the cat’s left ear, which is on the right when you’re looking at your cat.
4. Always Start With the “Good” Ear First
If your cat only has an ear infection in one ear, it is important to just clean the healthy ear first and then clean and medicate the infected ear. Only the infected ear should be medicated.
Since infection can spread between ears, be sure to wash your hands and use new supplies after touching each ear, and don’t go back to the other ear. If you’re using gloves, put on a new glove when you switch ears. This is a good rule even if both ears are infected.
5. Clean Your Cat’s Ears
To maximize the effectiveness of the medication, thoroughly clean your cat’s ear before giving the medication, unless you are told otherwise by your veterinarian. For severe and painful cat ear infections, your vet may recommend that you medicate first for a few days to make your cat more tolerant to ongoing cleanings.
The goal of an ear cleaner is to help break up debris and wax without causing irritation. Cat ear infection home remedies like hydrogen peroxide and vinegar solutions are not recommended, as they often cause more irritation and discomfort.
Do not use too much liquid, as cats are much more sensitive to having fluid in their ears than dogs, and excessive fluid can result in incoordination.
Steps for Cat Ear Cleaning
There are a variety of cat ear cleaning methods, I recommend this one because it’s less time consuming and more feline-friendly:
-
Heavily moisten a cotton ball with the ear cleaner.
-
Apply the cotton ball to the base of the ear and fold the ear flap over onto the cotton ball.
-
Massage the base of the ear (you should hear a squishing sound), and then allow your cat to shake his head.
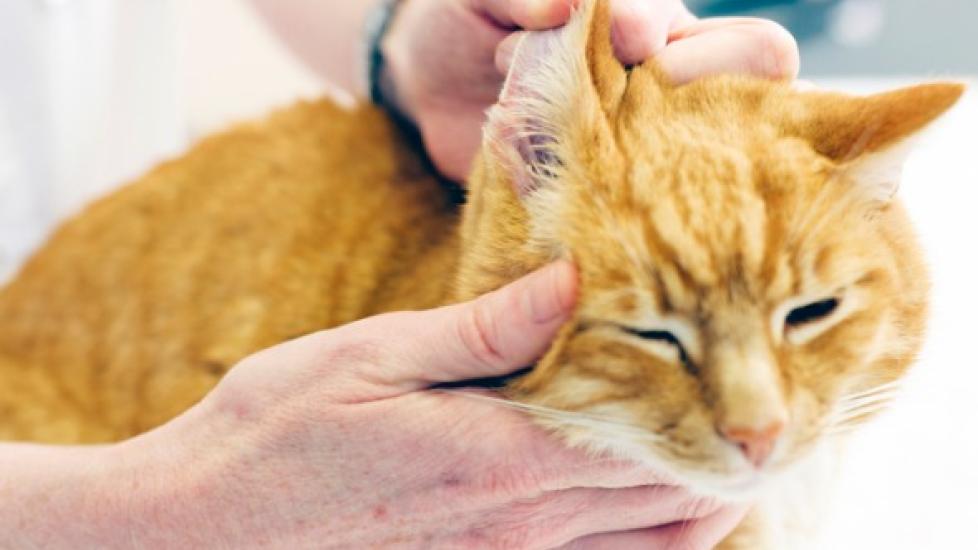
6. Apply the Medication
Wait 10 to 15 minutes after cleaning to apply the ear medication.
-
Gently pull the ear up and squeeze the liquid medication (without touching the nozzle to the ear itself) down into the canal. A thin layer of ointment should coat the entire lining of the canal.
-
Massage the base of the ear again, if your cat allows, and then let your cat shake their head.
-
Wipe out any debris with a cotton ball. Do not use gauze or cotton swabs. They are more abrasive and can push debris further into the canal, leading to impaction and an increased risk of eardrum rupture.
If any oral medications were prescribed, administer the full amount to your pet, including any refills. Most antibiotics are given for at least one week past the resolution of clinical signs.
7. Monitor Your Cat’s Progress
While your cat is recovering from their ear infection, watch for these signs that your cat’s ears are responding to the treatment:
-
Decreased pain and sensitivity
-
Decreased signs such as head shaking, facial rubbing, or scratching at the ears
-
Improved redness, odor and discharge while cleaning
If you are noticing any of the following warning signs, discontinue treatment and contact your vet:
-
Your cat is fighting harder against the cleaning and application of medication
-
Red discharge from the ear
-
Red and white blisters in the ear or ear canals
-
An increase in odor or debris in the ear
-
Increased temperature or swelling of the ear
While it’s not common, some cats can develop sensitivities to the medication, and the above signs may be indicative that your cat has developed an allergic reaction.
8. Schedule a Recheck Exam
Recheck examinations are one of the most vital steps in successful cat ear infection treatment. Most ear infections are treated for a minimum of two to three weeks, but this can be extended, especially if there are any underlying or predisposing factors such as allergies.
During this visit, another sample will likely be taken from the ear canal and examined under a microscope. For this diagnostic to be successful, do NOT clean or medicate your cat’s ears at least 24 hours prior to the exam.
Your veterinarian can check to see whether the infection has resolved, particularly if your cat has had ear infections in the past. If it’s not, additional testing and treatment may be required.
Remember, even if your cat stops scratching or their ears look better, the infection may not have fully resolved. Since a cat’s ear canal is shaped like the letter L, debris such as hair, impacted wax, or residual infection can be hidden despite a normal, healthy-appearing ear.
Once the issue is resolved, speak to your veterinarian about ways to prevent reoccurring cat ear infections and other ear issues, and how often to clean your cat’s ears going forward.
Featured Image: iStock.com/subman